Webhooks
Webhooks allow you to send real-time data from WhautoChat to external applications when specific events occur - no need for manual updates or polling.
✅ General Use Cases
Below are the available webhook event types:
👥 Contacts
- Contact Created: Triggered when a new contact is created.
- Contact Tag Added: Triggered when a tag is added to a contact.
- Contact Tag Removed: Triggered when a tag is removed from a contact.
💬 Incoming & Outgoing Messages
Applies to WhatsApp, Instagram, Messenger, Telegram, and Live Chat:
- Incoming Message: Triggered when a new message is received from a user.
- Outgoing Message: Triggered when a new message is sent to a user.
⚙️ How to Set Up Webhooks
There are two ways to configure webhooks in WhautoChat:
Method 1: Quick Setup – New Webhook
- ⚠️ You can configure up to 5 webhooks; each can listen to multiple selected events.
- Only HTTP POST requests are supported. Payload customization is not available in this method.
Steps:
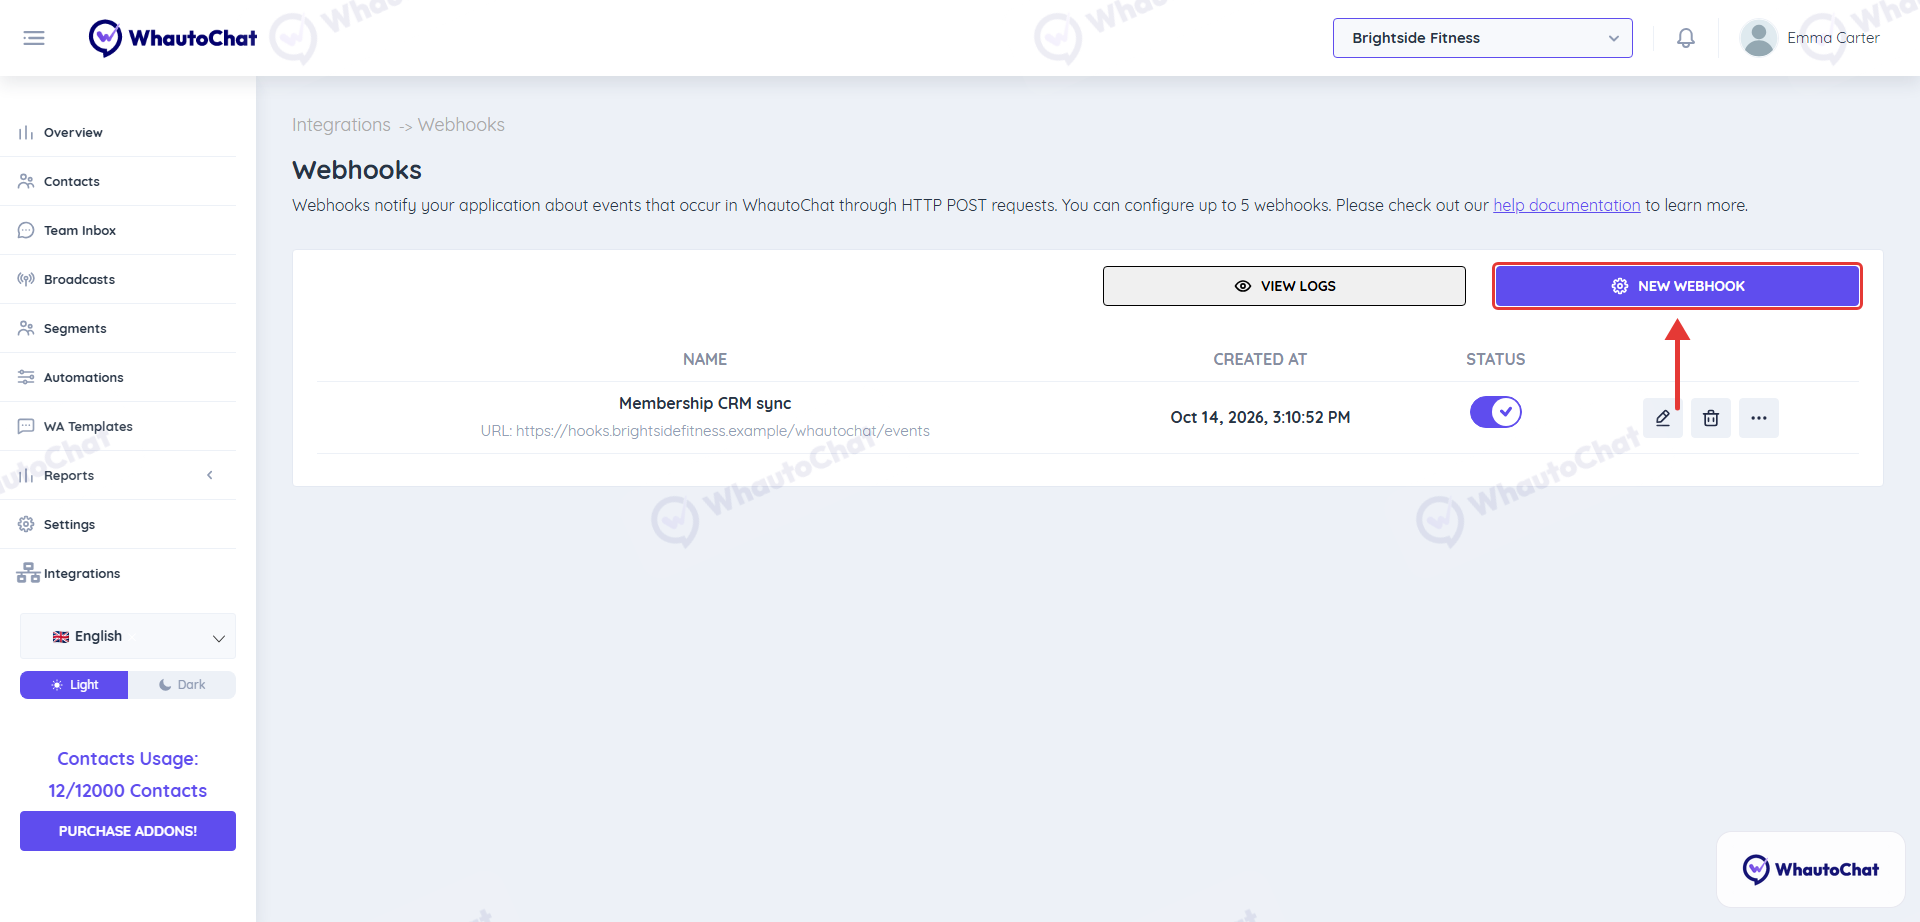
- Open the WhautoChat app, go to the Integrations menu, and click Connect (or Edit Setup) on the Webhooks card.
- Click the New Webhook button.
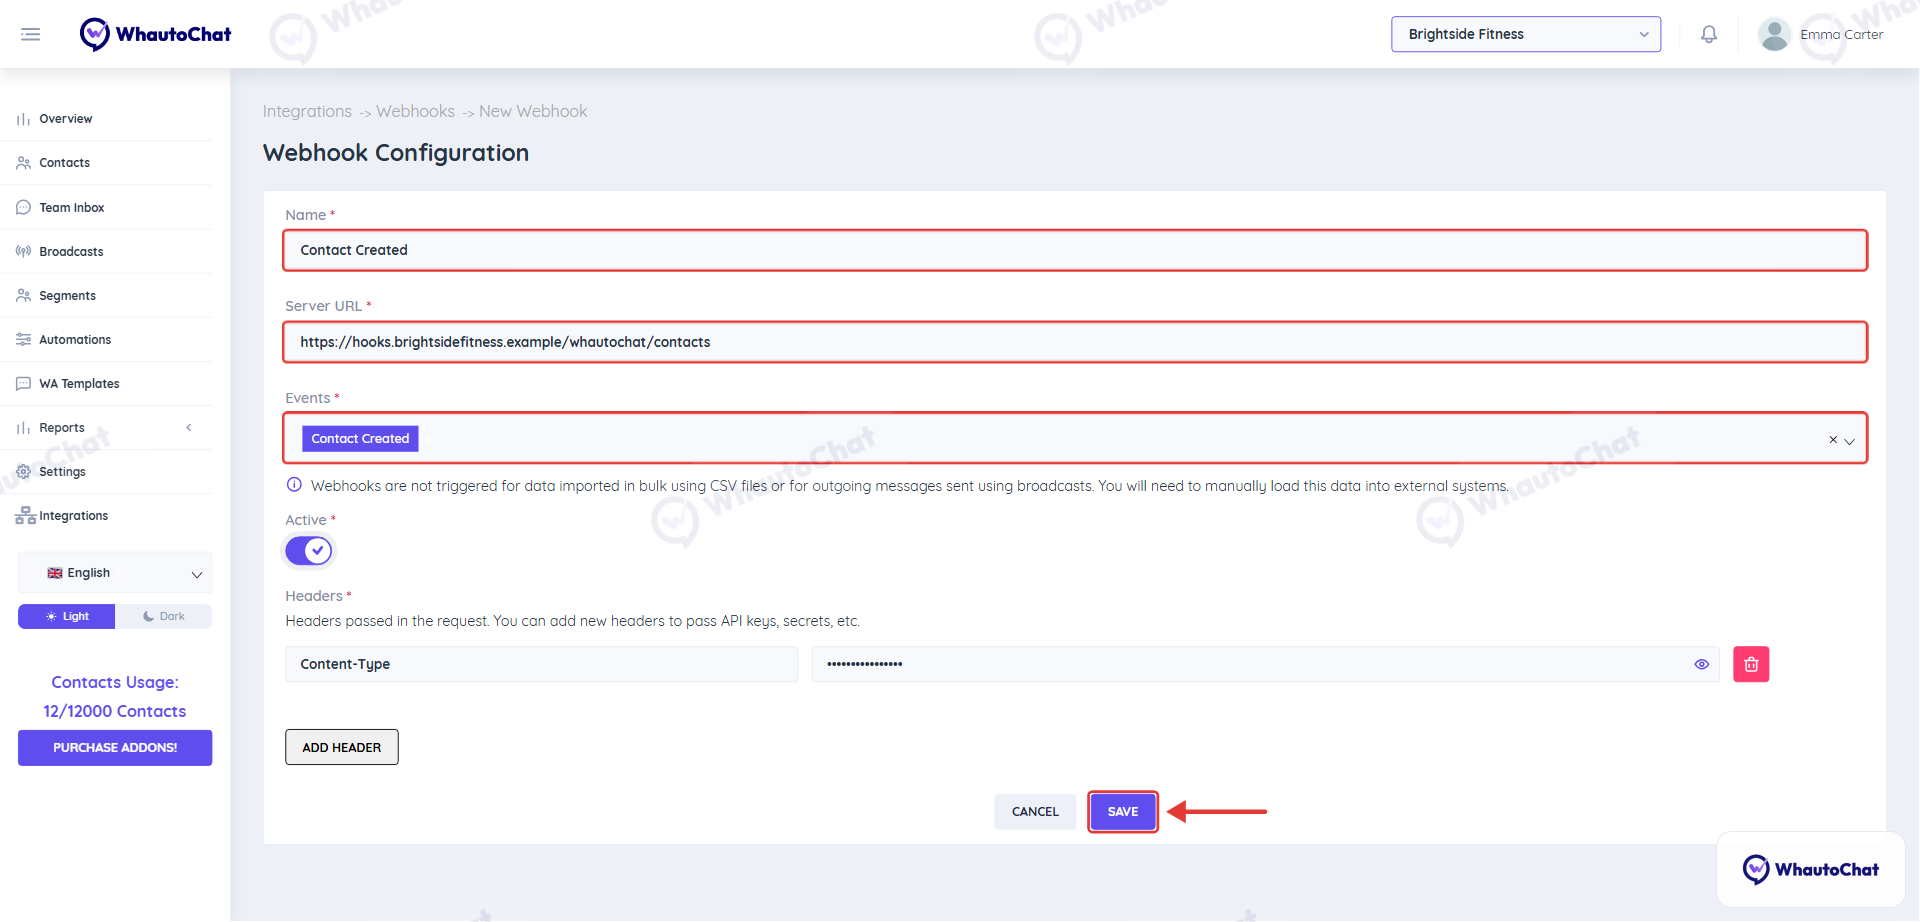
- Fill in the following:
- Name (e.g., Contact Created)
- Server URL: Where the webhook payload will be sent
- Events: Select one or more events (e.g., Contact Created)
- Active: Turn it on
- Headers: Keep the default
Content-Typeheader or click Add Header to add your own
- Click Save to finish the setup.
Method 2: Advanced Setup – Customized Payload via Automation
- ✅ This method supports full payload customization, dynamic variables, and custom headers using RESTful endpoints.
Steps:
- Go to the Automations menu → Click Add Rule → Choose Create rule from scratch.
- Set the trigger (e.g., When a Contact is created).
- (Optional) Click Add Condition to filter the trigger logic.
- Click Add Action and select Send Webhook.
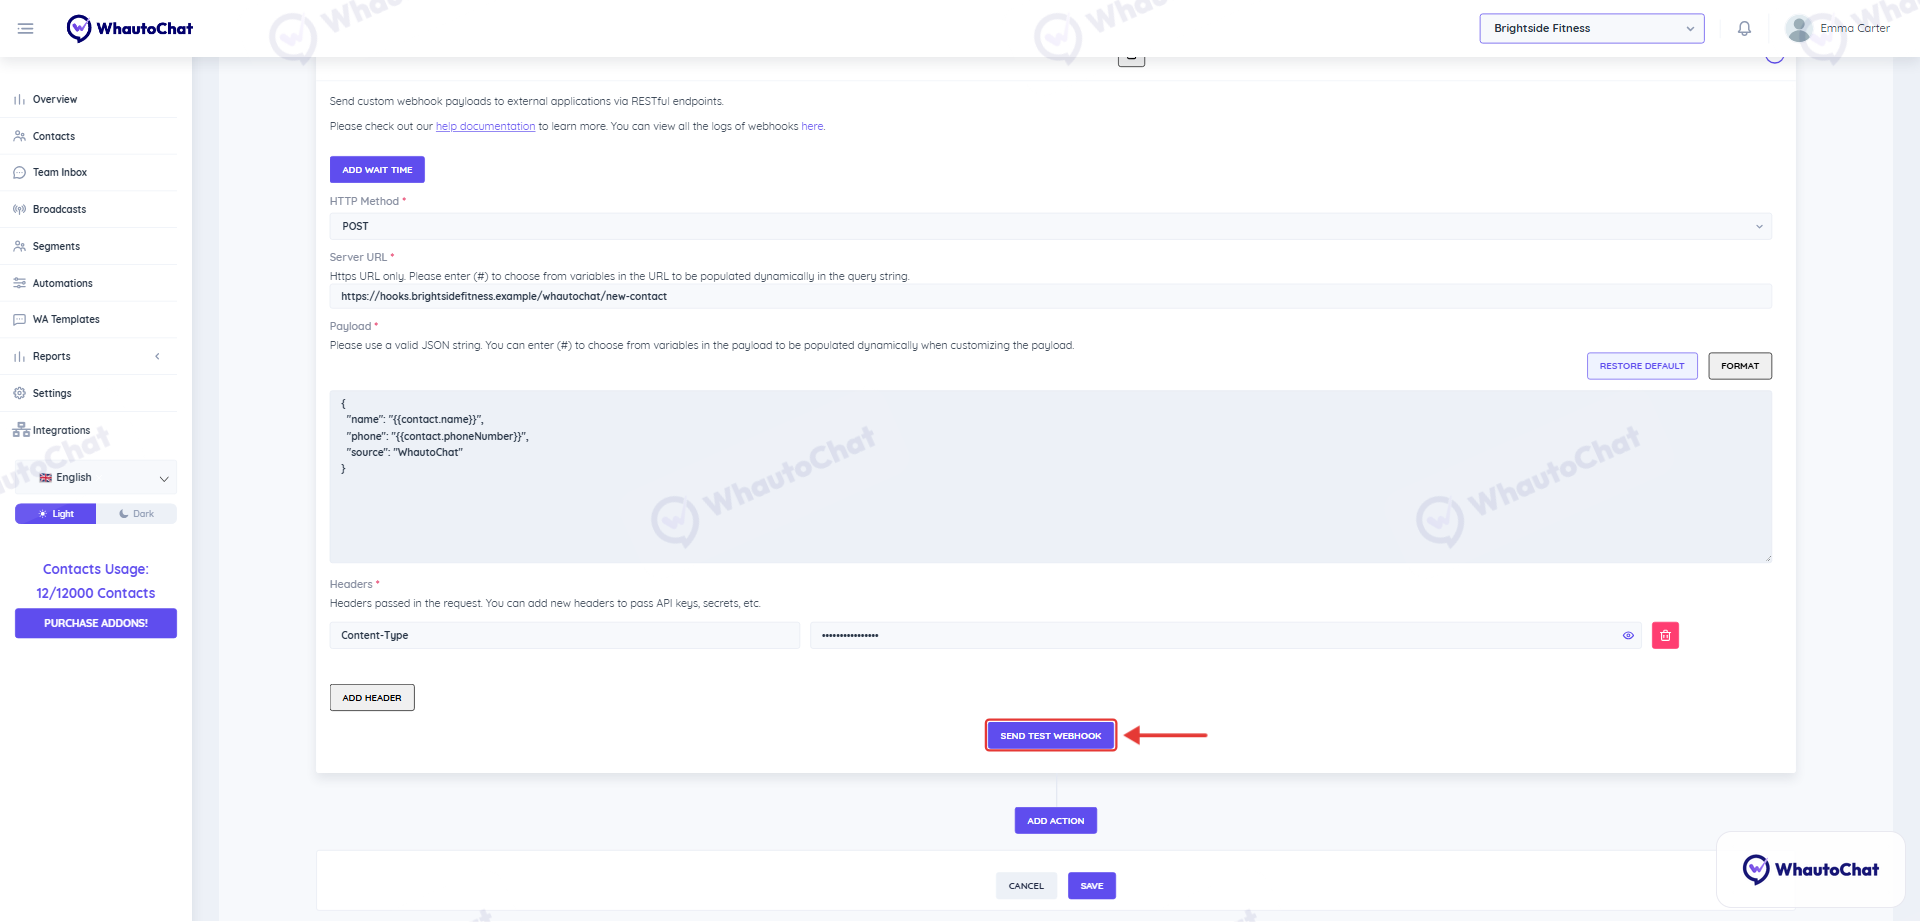
- Fill out the Webhook Configuration:
- HTTP Method: Select POST
- Server URL: Enter your webhook receiver endpoint (HTTPS only)
- Payload: Customize the JSON payload using dynamic variables (#) from WhautoChat, for example
{{contact.name}} - Headers: Use the default header or click Add Header to include custom headers
- Click Send Test Webhook to test your setup.
- Click Save once done.
🧪 How to Test Webhooks
Testing is critical before going live. Here’s how to do it:
- Visit https://requestbin.com and sign up.
- Click Create Request Bin to generate a test webhook URL.
- Copy the generated Request URL and paste it into your Webhook setup in WhautoChat (Step 5 above).
- Trigger the automation (e.g., create a new contact).
- Return to RequestBin and inspect the incoming test payload.
- Once verified, click Save in WhautoChat.
The Request URL is your endpoint that listens to real-time events from WhautoChat. Use services like RequestBin (Pipedream) for testing, or connect your live system directly.
💬 Need Support?
Having trouble configuring or testing webhooks? Contact our support team at [email protected] - we're here to help.
For detailed troubleshooting, refer to our FAQ or contact support.